
Ever wondered how live edge tables are made? These stunning pieces of furniture bring the natural beauty of wood into your home, with edges that follow the tree’s original shape. They’re not just tables; they’re works of art. But making one? That’s a whole process. From choosing the right wood to finishing touches, every step matters. Let’s take a closer look at what goes into crafting these unique tables.
Key Takeaways
Live edge tables preserve the natural edge of the tree, making each piece one-of-a-kind.
Selecting the right wood is crucial for durability and aesthetics.
The process involves careful preparation, including debarking, drying, and stabilizing the wood.
Finishing touches like sanding, smoothing, and protective coatings enhance the table’s look and longevity.
Assembling the table includes choosing and attaching the perfect base.
Introduction to Live Edge Tables
Live edge tables are more than just furniture—they’re a way to bring the natural beauty of the outdoors into your home. These tables keep the tree’s original edge intact, showcasing the unique curves and textures that make each piece one-of-a-kind. Unlike traditional tables with straight, milled edges, live edge tables celebrate the imperfections and character of the wood. This is what makes live edge furniture creation such a rewarding craft.
So, what exactly is a live edge? It’s the untouched, natural edge of a wood slab, often with the bark removed but the tree’s shape preserved. This design style is perfect for anyone looking to add a touch of rustic charm or organic elegance to their space.
Why Choose a Live Edge Table?
Uniqueness: No two live edge tables are the same; each one tells its own story.
Natural Aesthetic: The raw beauty of the wood brings warmth and character to any room.
Versatility: Whether your style is modern, rustic, or somewhere in between, live edge tables can complement it beautifully.
Quick Tip:
If you’re considering making your own live edge table, start by learning about the different types of wood available. For example, walnut and maple are popular choices for their stunning grain patterns.
Live edge furniture isn’t just about the finished product—it’s about the journey. From selecting the perfect slab to sanding and finishing, each step is an opportunity to connect with the natural world. And, if you’re curious about the materials and tools needed to create a live edge dining table, check out our essential guide for more insights!
What Makes Live Edge Tables Unique
Live edge tables are all about celebrating the natural beauty of wood. They stand out because they keep the edges of the wood slab intact, preserving the original shape of the tree. This creates a piece that feels organic, raw, and truly one-of-a-kind. Unlike traditional tables where the edges are cut straight, live edge tables embrace the irregularities of nature—knots, curves, and all. This is what gives them their unmatched character.
Why People Love Live Edge Tables
Natural Aesthetic: With their flowing, irregular edges, these tables bring a touch of the outdoors inside.
Unique Design: No two live edge tables are the same, making each one a personal statement piece.
Versatility: They work with various styles, from rustic to modern, fitting seamlessly into many spaces.
Materials That Shine
Typically, live edge tables are crafted from hardwoods like walnut, maple, or oak. These woods not only highlight the grain patterns beautifully but also ensure durability for years to come.
A live edge table doesn’t just furnish a room—it tells a story. Each curve and line is a reminder of the tree it came from, blending functionality with artistry.
Selecting the Right Wood for Live Edge Tables
Popular Wood Types Used
When it comes to crafting a natural wood table design, the choice of wood is everything. Here are some popular options:
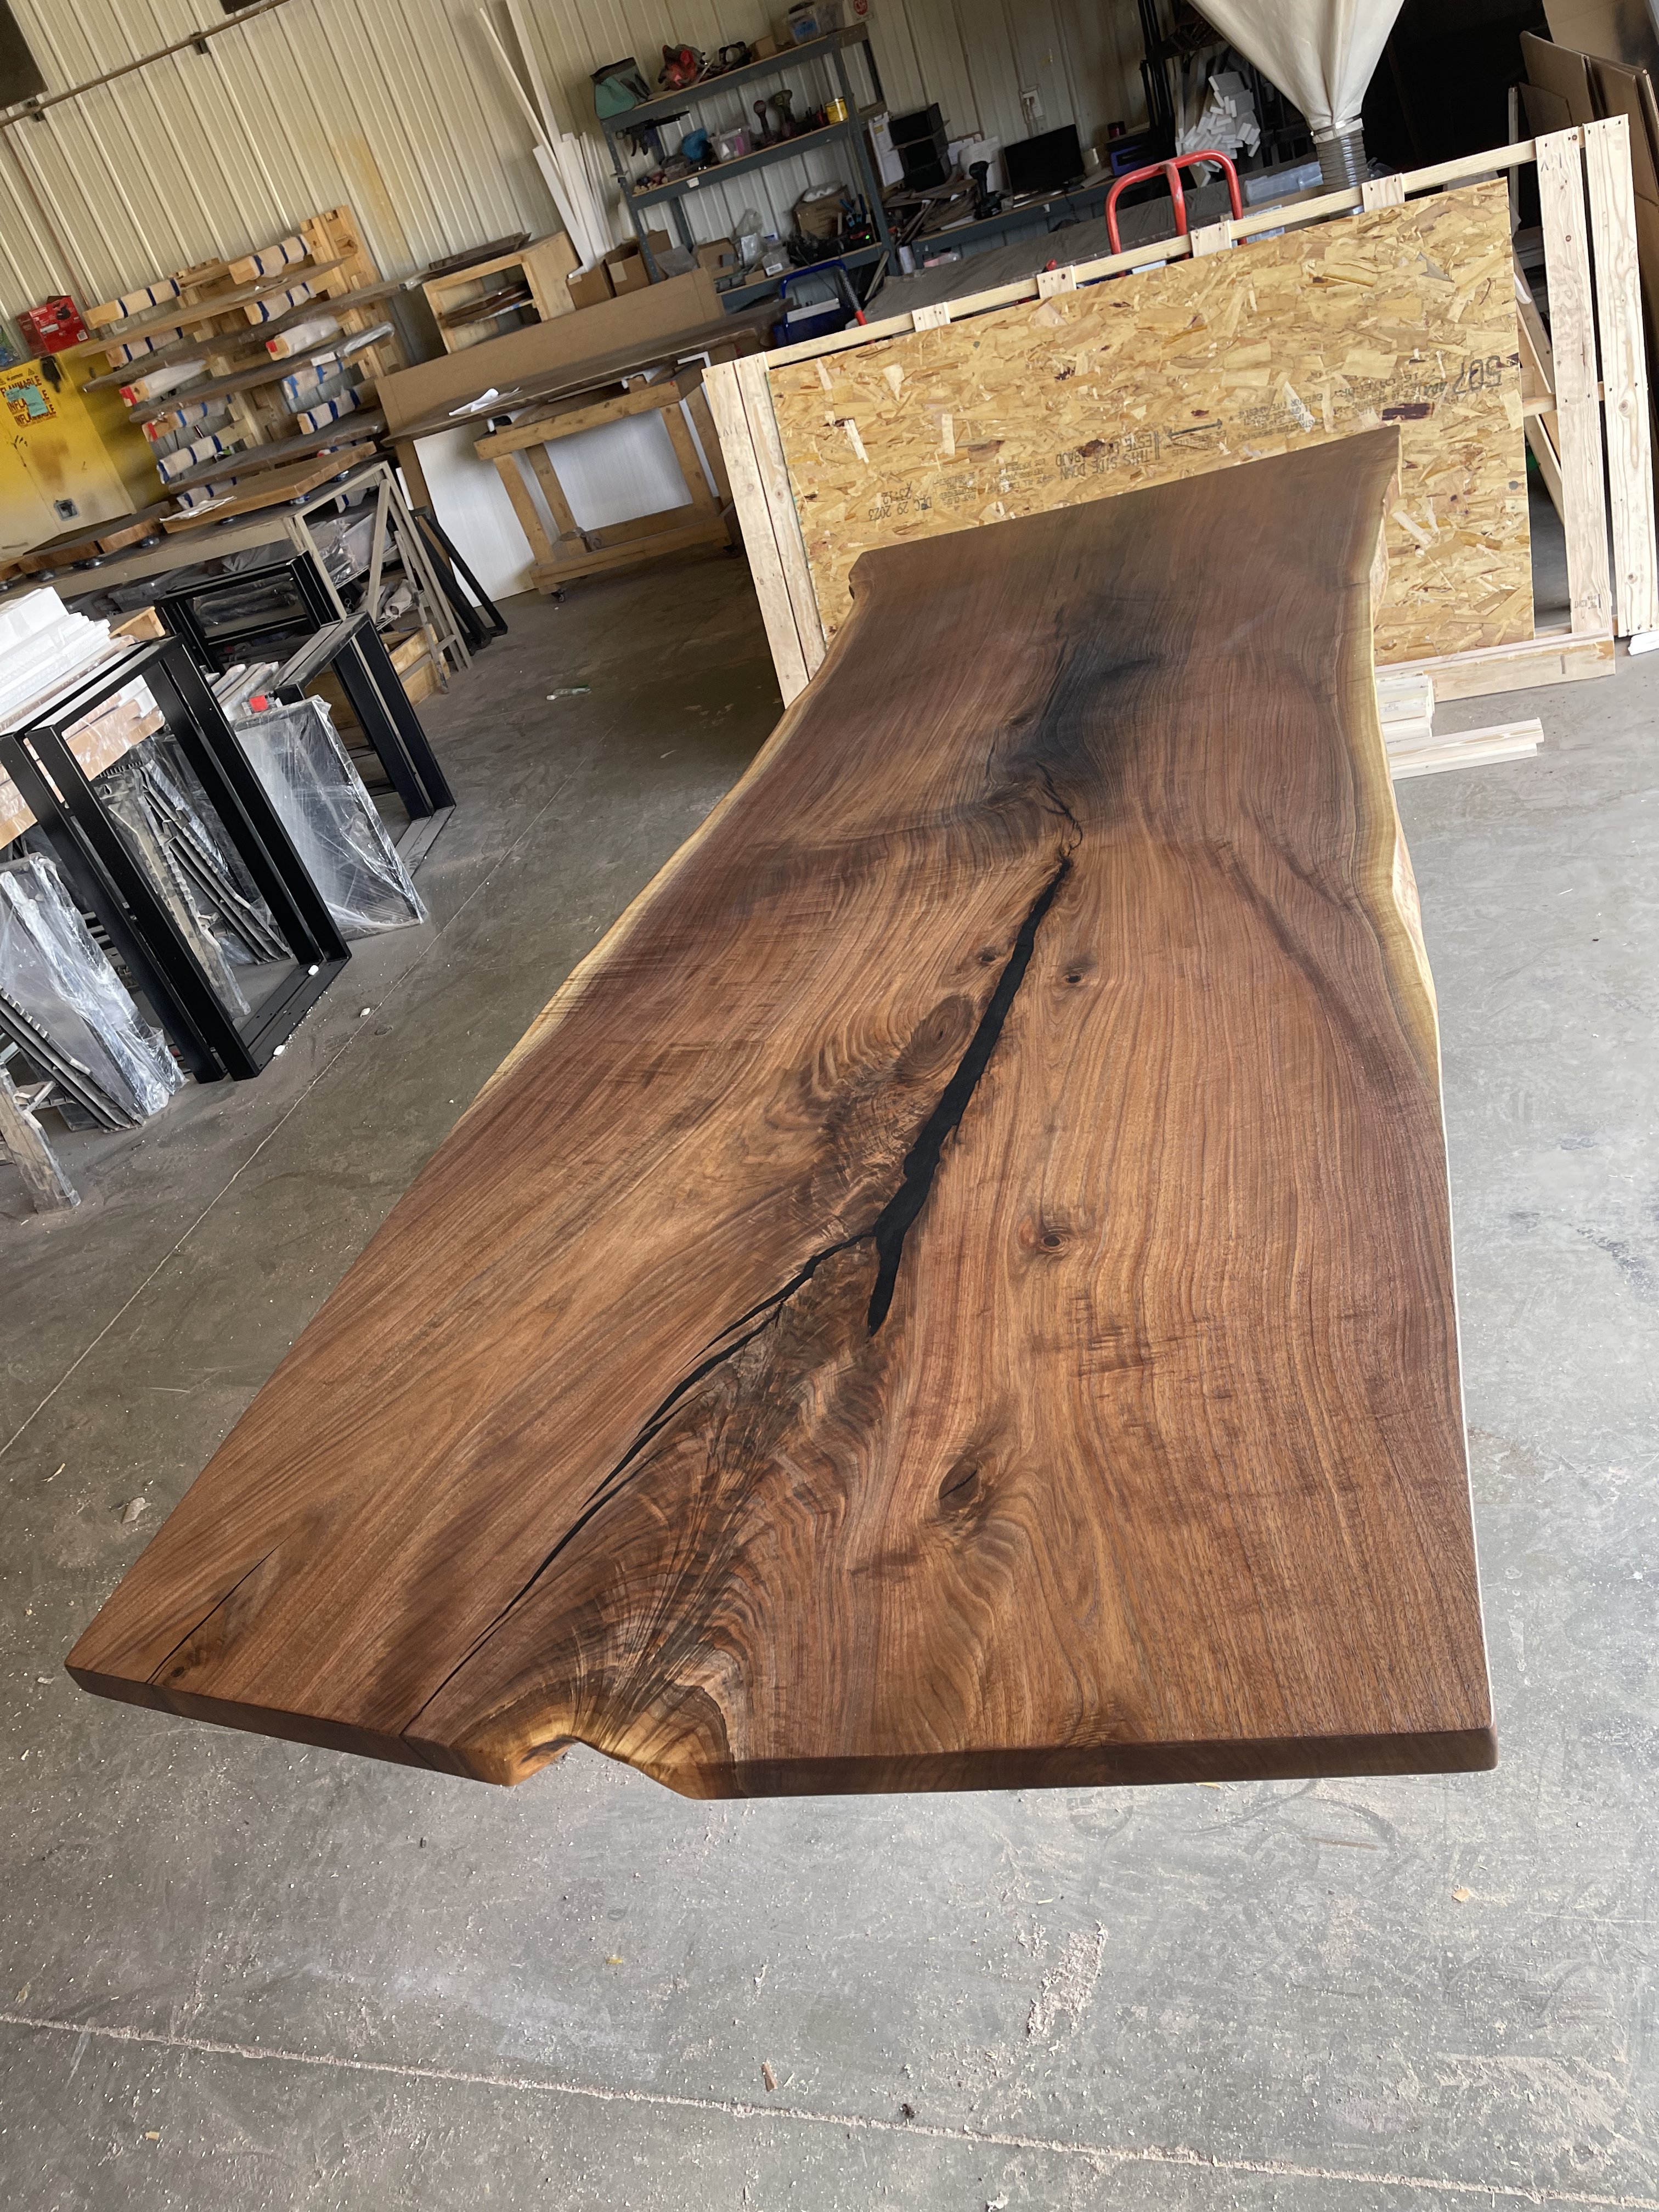
Black Walnut: Known for its deep, rich tones and striking grain patterns. It’s a favorite for its timeless elegance.
Maple: Light-colored and smooth, maple gives a clean and modern vibe.
Cherrywood: Over time, this wood darkens beautifully, adding character to any piece.
Oak: Durable and versatile, both red and white oak are common choices for their strength and unique grain.
Each type of wood offers something distinct, making it easier to match the table to your personal style or the room’s aesthetic.
Sustainability Considerations
Beyond aesthetics, it’s important to think about where the wood comes from. Here are a few tips to ensure your live edge table is eco-friendly:
Opt for locally sourced wood: This reduces the environmental impact of transportation.
Look for suppliers who practice sustainable harvesting methods.
Consider reclaimed wood for a truly unique and environmentally conscious option.
A live edge table isn’t just furniture—it’s a connection to nature. Choosing sustainable materials ensures that this connection lasts for generations.
If you’re considering a Live Edge Black Walnut Single Slab Coffee Table, its natural beauty and craftsmanship make it a standout choice for any space.
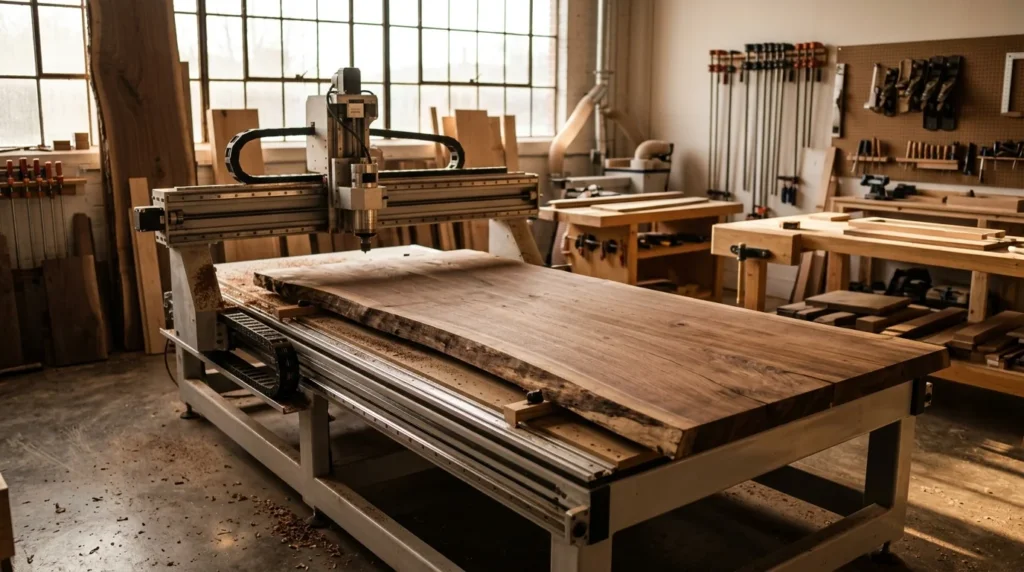
Preparing the Wood
Debarking and Cleaning
The first step in getting your live edge wood ready is removing any loose bark. While some people like to keep bits of bark for aesthetic reasons, it’s not always practical—it can flake off over time. Tools like scrapers or chisels work well here, and for stubborn areas, a wire brush can help. This process ensures a clean and stable edge to work with. Make sure to inspect the wood for dirt, grime, or even insects that might be hiding in the crevices. A thorough cleaning sets the stage for everything else.
Drying and Stabilizing the Wood
Once your slab is clean, it’s time to dry it. Proper drying is critical to prevent cracking or warping later. Air-drying is a common method, but it takes months, sometimes even years, depending on the thickness of the wood. For a quicker option, kiln drying is a great alternative—it removes moisture efficiently and kills any pests. After drying, stabilizing the wood with a sealant or epoxy can protect it from future damage and lock in its natural beauty.
Taking the time to prepare your wood properly might seem tedious, but it’s what separates a good table from a truly great one.
Shaping the Live Edge

Shaping the live edge is where the raw beauty of the wood truly comes to life. This step is all about preserving the natural contours of the tree while refining the slab into a functional piece of art. The goal is to highlight the wood’s organic charm without losing its structural integrity.
Steps to Shape the Live Edge
Examine the Wood: Start by closely inspecting the slab. Look for loose bark, cracks, or any irregularities that might need attention. This helps you decide how much of the natural edge to keep.
Remove Loose Bark: Using tools like a chisel or a stiff wire brush, carefully strip away any loose or decayed bark. For instance, when working with silver maple slabs, this step is essential to prevent insect infestation and deterioration. Learn more about maintaining live edges.
Smooth the Edge: After debarking, sand the edge lightly to remove splinters while keeping the natural shape intact. Use fine-grit sandpaper to achieve a smooth yet organic finish.
Tips for a Perfect Live Edge
Keep it Natural: Avoid over-sanding or cutting too much of the edge. The irregularities are what make live edge tables unique.
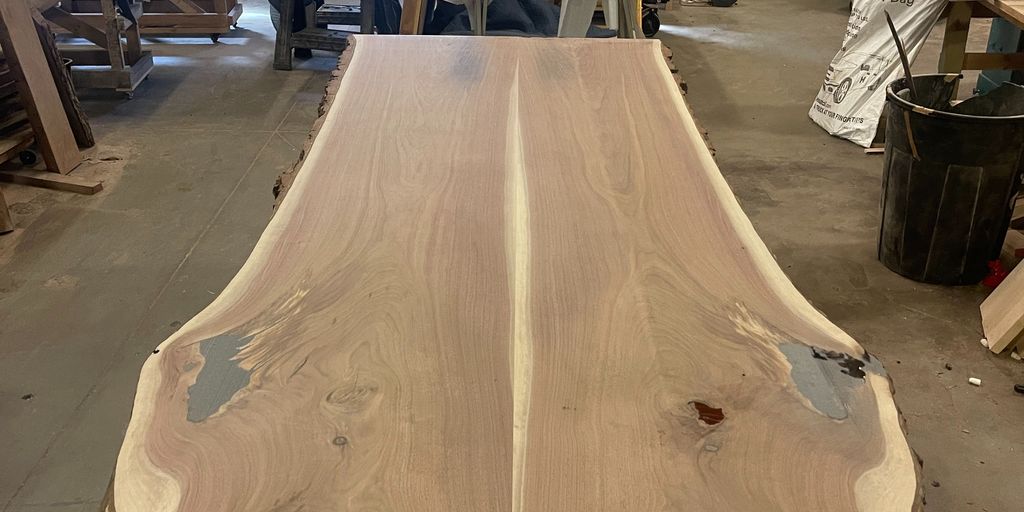
Stabilize Cracks: If there are cracks or voids, consider filling them with epoxy resin. This not only adds strength but can also create a stunning visual effect.
Test the Feel: Run your hand along the edge to ensure it’s smooth enough to touch but still retains its natural texture.
Shaping a live edge is like finding the perfect balance between nature and craftsmanship. It’s not about perfection—it’s about preserving the story of the tree while making it functional for everyday use.
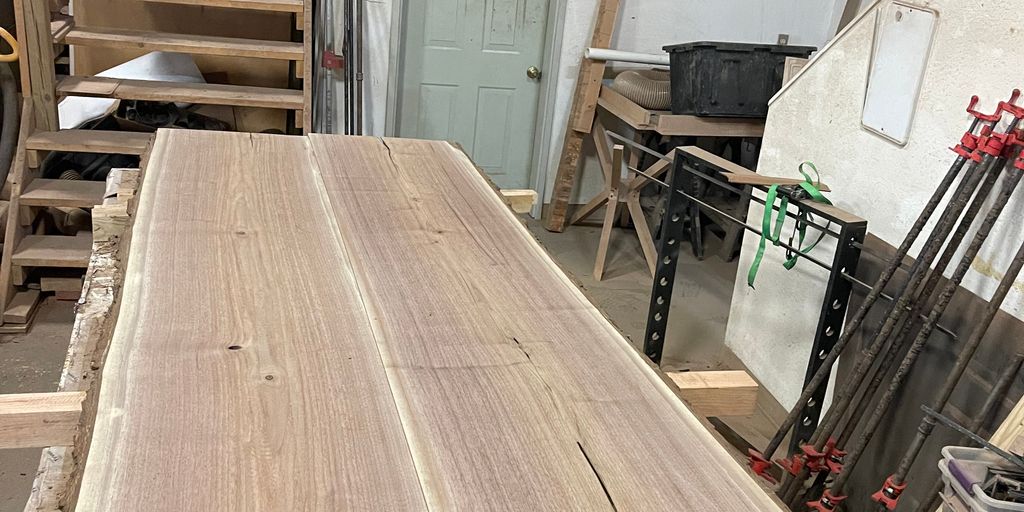
Sanding and Smoothing the Surface
Sanding is where the magic begins to happen, transforming a rough slab into something truly stunning. It’s not just about making the wood smooth—it’s about preparing it for the final finishes and bringing out the natural beauty of the grain. This step can make or break the final look of your live edge table.
Step-by-Step Sanding Process
Start with coarse grit sandpaper: Begin with a grit size around 40-60 to remove any rough spots, saw marks, or uneven surfaces. This is the heavy-duty stage where you’re shaping the wood.
Move to medium grit: Once the surface feels smoother, switch to a grit size of 80-120. This step helps refine the surface and prepares it for finer sanding.
Finish with fine grit: Use a grit size of 220 or higher to achieve a silky-smooth finish. This is where the wood starts to feel polished and ready for finishing.
Tips for Best Results
Always sand along the grain of the wood to avoid scratches that stand out.
Use a sanding block or an orbital sander for even pressure and consistent results.
Don’t rush—take your time to inspect the surface after each pass.
Taking your time with sanding ensures the wood’s natural features, like knots and grain patterns, shine through beautifully.
Optional: Filling Imperfections
For cracks or holes, consider using epoxy or wood filler. This step is optional but can add to the durability and aesthetics of your table. Pricing for fillers often depends on the slab’s size and the level of finish you’re aiming for.
When sanding is complete, your live edge table is one step closer to being a masterpiece. The next stage is all about applying finishes, like Rubio Monocoat, to protect and enhance the wood’s natural beauty.
Adding Finishes and Protective Coatings
When it comes to live edge tables, the finish is where the magic happens. This step not only enhances the natural beauty of the wood but also protects it from everyday wear and tear. A good finish can make the difference between a table that lasts a few years and one that becomes a family heirloom.
Choosing the Right Finish
There are several types of finishes available, each offering a unique look and level of protection:
Oil Finishes: These penetrate the wood, enhancing its natural grain and color. Popular options include tung oil and linseed oil.
Lacquer: A durable, glossy finish that provides excellent protection but requires careful application.
Rubio Monocoat: A modern oil finish that combines color and protection in a single coat.
Epoxy Coatings: Ideal for filling cracks and creating a glass-like surface, often used on river tables.
Application Process
Applying a finish is a multi-step process that requires patience and precision:
Clean the Surface: Ensure the wood is free of dust and debris.
Apply the Finish: Use a brush, cloth, or sprayer, depending on the type of finish.
Let It Cure: Allow the finish to dry completely, which can take anywhere from a few hours to a couple of days.
Sand Between Coats: For a smoother finish, lightly sand the surface with fine-grit sandpaper before applying additional coats.
Protective Coatings
To further protect your table, consider adding a protective topcoat:
Polyurethane: Offers a tough, water-resistant layer.
Wax: Provides a soft sheen and an extra layer of defense. Applying a thin coat of wax with a waxing brush can seal the wood and maintain its appearance.
Taking the time to apply the right finish and protective coatings ensures your live edge table will not only look stunning but also stand up to the rigors of daily use.
Assembling the Table
Choosing the Base
The base of your live edge table is more than just support—it’s a key part of the table’s overall style. Bases come in a variety of shapes and materials, from sleek steel legs to classic wooden trestles. When choosing, think about the vibe you’re going for. Do you want a modern industrial look? Steel might be your best bet. Prefer something cozier? A wooden base might be the way to go. Whatever you pick, make sure it’s sturdy enough to handle the weight of the wood slab.
Here’s a quick comparison of common base materials:
Base Material | Style | Durability |
|---|---|---|
Steel | Modern, Industrial | High |
Wood | Rustic, Traditional | Medium-High |
Mixed (Wood & Steel) | Versatile | High |
Attaching the Base to the Slab
Once you’ve got your base, it’s time to attach it to the slab. This part can feel a little nerve-wracking, but with the right tools, it’s straightforward. Here’s a step-by-step guide:
Position the slab: Place your wood slab upside down on a soft surface to avoid scratches.
Align the base: Center the base on the underside of the slab. Measure twice to ensure it’s even.
Mark drill points: Use a pencil to mark where the screws will go. Make sure the marks align with the pre-drilled holes in the base (if any).
Drill pilot holes: This step is crucial to avoid splitting the wood. Drill shallow pilot holes where you’ve marked.
Secure the base: Using screws and a power drill, attach the base to the slab. Tighten each screw gradually to keep everything balanced.
Tip: If your slab is especially thick or heavy, consider using threaded inserts for extra stability. They distribute the weight more evenly and make future adjustments easier.
And that’s it! Your live edge table is almost ready to shine. Take a moment to admire your work before moving on to the finishing touches.
Final Touches and Quality Checks
When it comes to live edge tables, the final steps are where everything comes together. These finishing touches ensure the table isn’t just functional but also a stunning piece of furniture that can last for years.
The Final Sanding
The last sanding session is all about perfection. Using ultra-fine grit sandpaper, the surface is smoothed to a buttery finish. This step removes any tiny scratches or imperfections left behind from earlier stages. It’s this attention to detail that transforms a good table into a great one.
Inspecting the Live Edge
The live edge is the star of the show, so it gets a thorough inspection. Craftsmen check for any rough spots, splinters, or inconsistencies. If needed, minor adjustments are made to ensure the edge is both safe to touch and visually appealing.
Applying the Protective Coating
A protective finish is applied to seal the wood and bring out its natural beauty. Whether it’s a satin lacquer or a matte oil finish, this coating adds durability while enhancing the wood’s grain and color. For example, the Live Edge Black Walnut Epoxy River Table often features finishes that perfectly complement its unique epoxy design.
Quality Assurance Checklist
Before the table is declared complete, it goes through a final quality assurance process. Here’s what’s typically checked:
Stability: Is the table sturdy and balanced?
Finish: Are there any uneven spots or missed areas?
Hardware: Are the legs or base securely attached?
Aesthetic: Does the table meet the original design vision?
“This is the moment where the table transitions from a project to a masterpiece. Every detail matters.”
Packaging for Delivery
Finally, the table is carefully packaged to protect it during shipping. Padded materials are used to safeguard the edges and surface, ensuring it arrives in perfect condition.
Wrapping up these steps ensures that the table not only looks amazing but also stands the test of time, ready to be the centerpiece of any home or office.
Conclusion: The Art of Crafting Live Edge Tables
Crafting a live edge table is more than just woodworking—it’s about embracing the natural beauty of wood and turning it into something functional and timeless. These tables are a blend of rustic charm and modern design, making them stand out in any space.
Throughout the process, from selecting the perfect slab of wood to applying the final protective coating, the craftsmanship involved speaks volumes. Each table tells a story, showcasing the unique grains, knots, and curves of the tree it came from. This is what makes live edge tables not just furniture, but pieces of art.
For those passionate about “handcrafted wood table techniques,” the journey of making a live edge table is as rewarding as the final product. It’s also a nod to “sustainable furniture making,” as many artisans prioritize using responsibly sourced materials. This ensures that while we create beauty, we also care for the environment.
The art of live edge table crafting is a celebration of woodworking craftsmanship insights. It’s about honoring the natural world while creating something that will stand the test of time.
Wrapping It Up
Crafting live edge tables is more than just woodworking—it’s about creating something truly personal and lasting. From the natural beauty of the wood to the care that goes into every detail, these tables tell a story. Whether you’re looking for a centerpiece for your dining room or a statement piece for your office, a live edge table offers a unique blend of function and artistry. At the end of the day, it’s not just furniture; it’s a piece of nature brought into your space, made just for you.
Frequently Asked Questions
What is a live edge table?
A live edge table keeps the natural edge of the wood, showcasing the tree’s original shape. This gives the table a unique and natural look.
Which types of wood are best for live edge tables?
Popular choices include walnut, oak, maple, and cherrywood. Each type has its own appearance and durability, so it depends on your preference.
How do you care for a live edge table?
Clean it with a soft, damp cloth and avoid harsh chemicals. Use coasters and mats to protect the surface from scratches and heat.
Can live edge tables be customized?
Yes, you can choose the type of wood, size, shape, and even the base style to match your needs and decor.
Are live edge tables durable?
Yes, when made from solid wood and properly finished, they are built to last for many years with proper care.
How long does it take to make a live edge table?
It depends on the complexity and customization, but it can take several weeks to ensure quality craftsmanship.
Trusted by Industry Leaders
Join the Journal
New writing, delivered occasionally.
Quiet notes on craft, materials, and finished pieces — sent only when there's something worth reading.